
How to Change an Oil Filter
I just checked the mileage on my car as I pulled into Memphis, Tennessee. in the last two weeks, I have traveled almost 5,000 miles. Before that, when I got to my friend’s place in Ohio, she asked me if I had gotten my oil changed yet. I have not… not yet anyways. and working for an auto accident lawyer, I know just how important it is to keep our cars maintained as we are on the roads. Today, I am going to go over the process of changing your own oil filters. Not only is this good information to have. It is also easy and it can actually help you save money by doing it yourself. If you are in need of a car accident attorney, please do not hesitate to contact us. Consultations are free!
Auto Accident Lawyer | DIY Oil Filter Change
Today, we are going to approach our blog post a little different with our DIY instructions on how to change your own oil filter. the difficultly level is very low and will likely take 30-45 minutes to complete. The benefits of changing your oil filter regularly is that you are less likely to have breakdowns, and less breakdowns means, less accidents.
What You Need
Below is a list of supplies you will need in order to change your oil filter:
- oil filter wrench set;
- oil recycle container;
- funnel;
- air filter;
- specified type of oil per car’s manufacturer;
- clean rags;
- ramps;
- chucks;
- safety glasses;
- gloves
Once you get all of the necessary supplies, you can then move onto changing your oil filter.
Step-by-Step DIY Oil Filter Change
Step 1: Run The Engine
Did you know that warm oil drains faster than cold? the first step in changing your oil filter is to allow your engine to run for a couple of minutes. Make note: you never want to get your engine temperature all the way up to full operating temperature. That is because the oil and the engine will be too hot for the oil to drain safely.
Step 2: Drive Onto Ramps
If you have the necessary tools, drive your car onto two ramps. You will then want to apply to parking brake and then remove the keys from the ignition. Place the chucks behind the wheels in order to keep the car in place and for safety purposes. Put on your safety gloves and glasses before moving onto the next step.
Step 3: The Oil Drain Plug
Locate the oil drain plug and place it into the pan below it. If you need, consult your owner’s manual for the location of your oil drain plug. Loosen the plug with a socket wrench and remember that the oil will flow from an angle into the pan.
Step 4: Unscrew the Plug
Unscrew the plug by hand. and while you are doing this, pull the plug back toward the pan in order to keep the oil from rushing out. in this step, you want to be extra careful as the oil may be hot.
Step 5: Drain Old Oil
In this step, you want to drain the old oil. Find the location of the filler cap on your engine and remove it. Removing it will help the draining process go faster because air can then enter from the top.
Step 6: Replace The Oil Plug
Once you drain the old oil, make sure to replace and tighten the oil plug by hand. After the plug is hand-tight, make sure you secure it with your wrench. Do not over-tighten the drain plug.
Step 7: Remove Old Oil Filter
In this step, you want to remove the current, old oil filter. Even after you drain the old oil, the old filter can still contain hot oil. Position your oil pan under the old filter and carefully use the wrench in order to remove the filter. Use a rag to clean the mounting surface on the engine and make sure that the gasket from the old filter is not stuck to it.
Step 8: Place New Oil Filter
Before you replace the new filter, lightly coat rubber seal with fresh oil. Make sure that the filter is properly in place before screwing it on by hand.
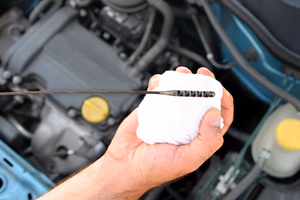
Step 9: Add New Oil
Take your clean funnel and add in new oil. Be careful, as not all of the oil may have drained out. You want to watch to make sure that you are not overfilling it. When you have added the necessary amount of oil, don’t forget to replace the cap.
Step 10: Look For Leaks
After you have replaced the oil and oil filter, run the engine and look for any noticeable leaks. If you see a leak after running the engine for a few minutes, cut off the engine and correct it. If there are no leaks, turn off the engine to allow the oil to drain.
Step 11: Check Oil Levels
Remove the dipstick and check the oil levels. Wipe it off and replace it. Then, remove it again to make sure it’s up to the “full” mark. If it’s not full, add the necessary amount. Once you are done, dispose of the old oil and filter properly.
Contact A Car Accident Attorney Today!
The steps to change your own oil and oil filter are incredibly easy. Not only that, but it is vital to keeping you and others safe on the road. Routine car maintenance is important to being safe on the road.
If you have been injured in an accident due to the negligent actions of another, please do not hesitate to contact an auto accident lawyer in our office. Our car accident attorneys have years of experience dealing with insurance adjusters. We know that they will do anything necessary in order to lowball or even deny your claim. They are not on your side. Their only goal is to save the insurance company money. Silverthorne Attorneys’ goal is to make sure you not only get the settlement you deserve, but that you get the proper medical attention. Your sole focus should be on healing from your injuries. Leave the rest to us!
Categories
Aviation Accident
Bicycle Accident
Boat Accident
Brain Injury
Burn Injury
Bus Accident
Car Accident
Catastrophic Injury
Construction Accident
Dog Bite
Electrical Injury
Escalator Accident
Food Poisoning
Motorcycle Accident
Our Firm
Pedestrian Accident
Personal Injury
Premises Liability
Product Liability
Slip & Fall Injury
Truck Accident
Wrongful Death
Summarize this article